 |
surfresearch.com.au
bill reid : styrofoam surfboard 1953 |
| home | catalogue | history | references | appendix |
|
This method was employed by New Zealand surfboard builders in the 1950s-early 1960s, as balsawood and polystrene blanks were difficult to obtain due to import restrictions.
Stryofoam, or Coolite,
in combination with expoxy resin was used for a short time in Australia
by McDonagh Surfboards in the late 1950s.
See:
1958 Ross Renwick
: Build a Plastic
Foam Surfboard.
Australian Outdoors,
November,
1958, pages 11 and 58.
The styrofoam-epoxy combination may have also been used by some American manufacturers.
This method became an accepted manufacturing method beginning around the mid-1990s, following years of intensive and expensive development by sailboard manufacturers, now comonly called epoxy boards
The board is 9 ft
6 inches x 25 inches with four strips of styrofoam laminated with a plywood
stringer ("keelson"), pre-shaped to set the bottom rocker.
It is recommended
that the blank is shaped with a "vegetable grater" and the resin applied
with a brush.
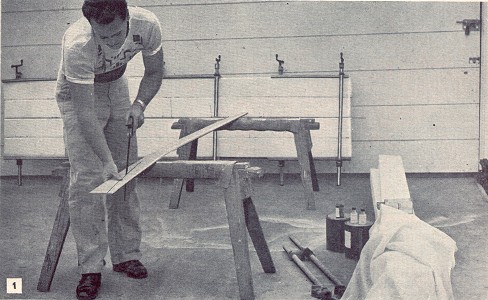
[1] Foam-plastic "boards" are glued together just like wood to form the body of the surfboard. |
 |
Page 158
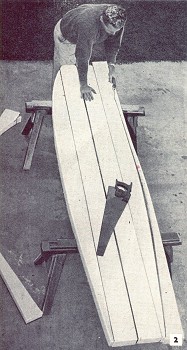 |
[2] Cut curved edges of board with a keyhole saw. |
|
the clamps, place
softwood strips under the jaws of each clamp to prevent the narrow jaws
from crushing the plastic at the edges. Note in Fig. 1 how the boards are
clamped.
After the glue
is dry - and be sure it is thoroughly dry- square the torward ends and
glue on short lengths of plastic to bring the length to 9 1/2 ft.
Then cut the
board to the rough shape shown in Fig. 2.
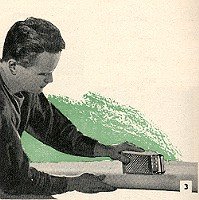
Finish to contour
as in Fig. 3, using a vegetable grater rather than sandpaper.
The former does
the trick faster and more smoothly as foam plastic does not abrade well.
Note the sectional
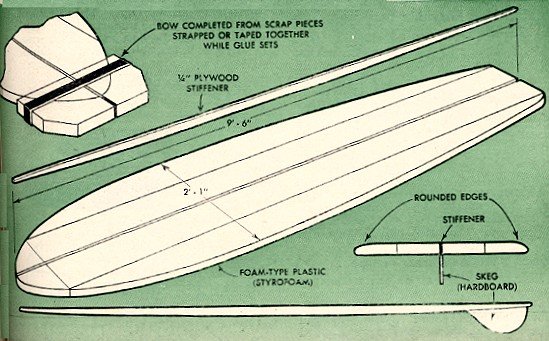
contour as in the detajl on page 159.
The topside,
or deck, is rounded at the edges but the bottom is left flat for stability.
When rounding,
be sure that the contours are uniform on both sides.
A simple cardboard
template will help in checking for uniformity of ihe curves.
Next, apply a
foam-plastic sealer to one side of the board and, while still wet, dampen
the muslin and smooth it over the sealer as in Fig. 4.
Be sure that
the fabric is in full contact over the surface then apply a second coat
of sealer, brushing it well into the cloth.
Allow one side
to dry before applying sealer and fabric to the other side.
When dry (allow
at least 8 hr.) turn the board over and apply sealer and cloth in the same
manner.
The fabric should
overlap at the edges about 1 1/2 in.
Give the laps
an extra coating of sealer.
After both sides
are thoroughly dry, sand the surface lightly.
The final covering
of glass cloth gives the board strength and rigidity.
You'll need about
3 1/2 yd. of glass cloth and 1 gal. of laminating resin.
You also will
need a catalyst and hardener especially made for use with this product.
Before using,
be sure to follow the instructions for mixing the materials.
Now cut glass
cloth to size and layover one side of the board, preferably on the side
opposite that on which the first piece of muslin was placed.
Coat immediately
with the resin "dope," being
Page 159
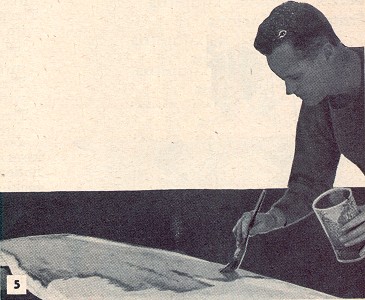
[5] After sealing,
board is finished with a "skin" composed of glass cloth impregnated with
a laminating resin.
After mixing
in accordance with instructions, this "dope" is applied over the glass
cloth with a brush.
Remove all
wrinkles and blisters.
 |
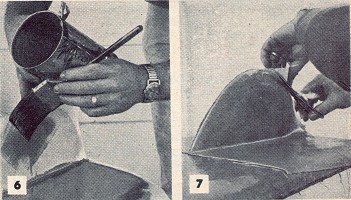 [6] Hardwood skeg is attached with a glass-cloth fillet built up on each side. |
careful to spread
the liquid in a uniform film, Fig. 5.
Smooth out any
bubbles or wrinkles may appear.
When one side
is finished, allow to dry before covering the opposite side.
When cutting
the piece for the opposite side, be sure that you cut it wide enough to
allow a 1 1/2in. overlap at both edges.
Apply in the
same manner as the first.
Figs. 6 and 7
show how to attach the skeg, which is cut from 1/2 or 3/8-in. oak to approximately
, the shape shown in the detail below.
It is about 8
in. wide and 12 in. long.
Round the curved
edge, then center the skeg on the stiffener.
Some trimming
may be necessary to assure a true fit.
Brush the edge
of the skeg, and also the area where it is to be placed, with the resin
coating.
Locate the skeg
and then build up a rounded fillet on each side with strips of glass cloth
laid in resin dope.
Follow by covering
the skeg with one thickness of glass cloth, trimming and overlapping the
edges as in Fig. 7.
As the final
step in the construction, make a kneeling pad just aft of midships by laying
two or more thicknesses of glass cloth in resin.
Apply a final
coat of resin to the entire board.
Allow coating
to dry thoroughly before using board.
 |
Volume 100 Number 1. July 1953. |

| home | catalogue | history | references | appendix |